List of Purchases
- pressure sensor (Simon)
- touch sensor (Simon)
- bluetooth module link
- rechargeable battery (Kaitlyn)
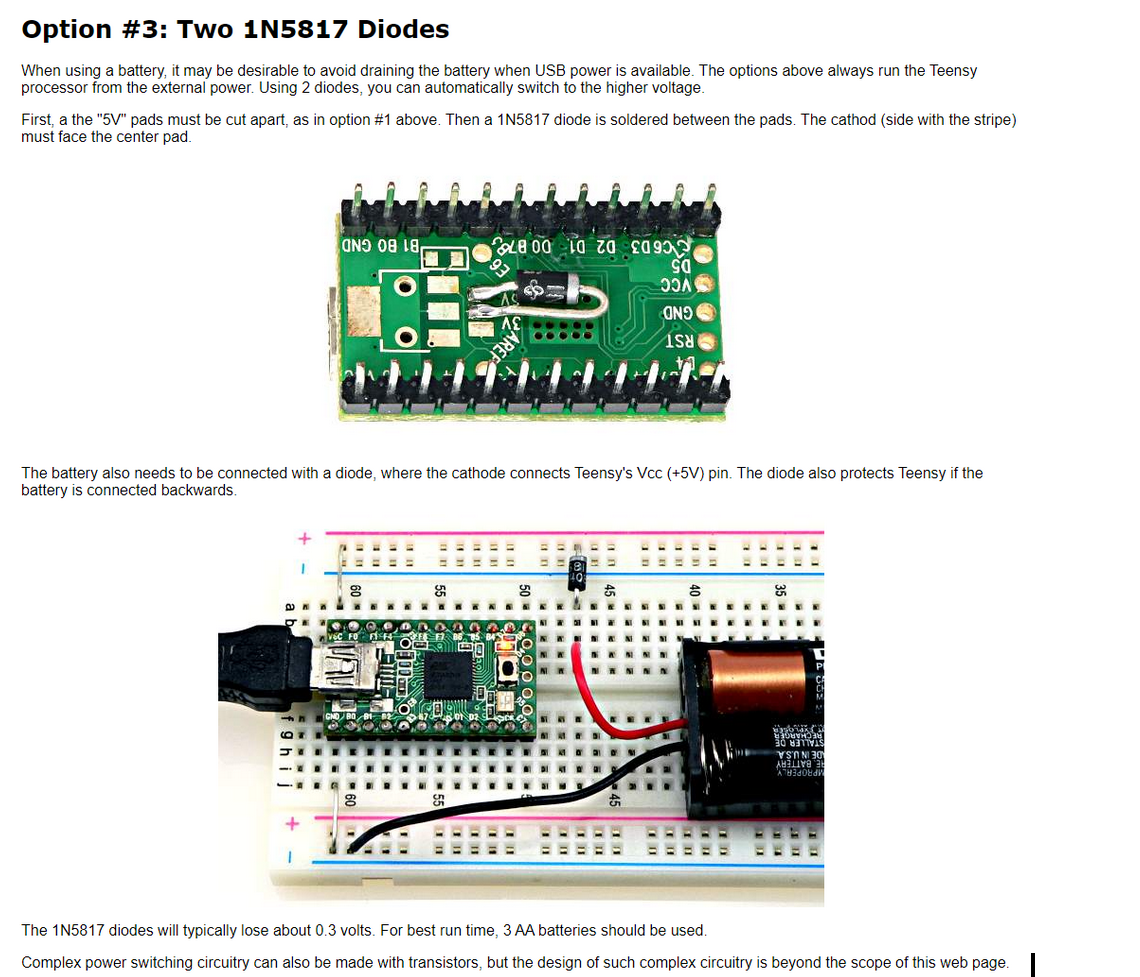
If we’re including both the usb and external battery options then we should probably follow this option 3 recommended from this link. These diodes are only needed if we want to power the board with both methods, though it is still recommended to add one diode between the battery and teensy to protect it from accidental reverse polarity connections. Not doing this can result in accidental reverse polarities and draining the battery when the USB power is available.
Teensy 3.0+ uses a similar ARM configuration so we can follow the similar steps of the 4.0 board for 4.1. More details can be found on this forum
Some key points to note about the battery configuration that we need:
- The voltage does not go above 5.5V and the teensy will start browning out and shutting down below a battery voltage of 3.6V
- If the battery setup we use is below 5.5V and above 3.6V, we may want to consider a buck-boost regulator like the VERTER 5V USB Buck-Boost - 500mA from 3V-5V / 1000ma from 5V-12V
- Boost Switching Regulator IC Positive Fixed 5V 1 Output 1A (Switch) SOT-23-6 Link
- TS63901 link
- If the battery setup we use is above 5.5V, we could use a linear regulator to step down the power supply (though it’s not very efficient) or use a buck regulator like the MPM3610 5V Buck Converter Breakout (its pin compatible)
- We can use Lithium ion Polymer Battery (3.7V and 1000 mah). So, I think we might need a buck-boost regulator.
- Some sites recommend using LiFePO4 batteries for safety regulations (ie overheating/overcharging)
- wireless charging module
- pen tips
- plug-in wires for pins (angela)